autogeekonline car wax, car care and auto detailing forum Autogeek on TV
car wax, car care and auto detailing forumAutogeekonline autogeekonline car wax, car care and auto detailing forum HomeForumBlogAutogeek.net StoreDetailing Classes with Mike PhillipsGalleryDetailing How To's
 
Thanks Thanks:  0
Likes Likes:  0
Dislikes Dislikes:  0
Page 1 of 2 12 LastLast
Results 1 to 10 of 13
  1. #1
    Regular Member
    Join Date
    Apr 2010
    Location
    Fort Wayne, Indiana
    Posts
    123
    Post Thanks / Like

    Question Best Pad Prep For DA?

    I am looking at detailing this weekend. Using a DA for the first time. The Car is a 1991 toyota corolla LE, It is clear coated. I am going to be doing this detail as my correction detail.

    I am thinking that I may need to step it up to m105 but I will be starting with M205.

    I use to do all of my details by hand. I know M105 for dusting but I didnt mind it for my results...

    A DA is different though as I will not be able to control the dust.

    Because it is going to be Thursday tomorrow I cannot get something from Autogeek in time like ONR, etc.

    My question.

    1. What OTC (over the counter only) product can I use to prep the pad if it comes down to using M105?

    2. Will adding a prep agent (water, QD, IE) will it effect the cut of the product.

    3. I looked and looked but does anyone have the link for Mike P.'s cleaning a pad on the fly?

    Thanks

    Brad.
    Working on a new sig..... still working....... if only it was as easy as buffing out swirls is...... Brad is my name.

  2. #2
    Super Member Y2KSVT's Avatar
    Join Date
    Jul 2010
    Location
    Leo, IN
    Posts
    823
    Post Thanks / Like

    Re: Best Pad Prep For DA?

    I think a lot of people have had good luck prepping the pad with M105. Just apply M105 to the entire pad and gently push it into the pad with your fingers/thumbs. Once you have it pretty well soaked into the pad, apply just a few dime-sized dots of M105 and start your first section pass. After each section, add a few more dime-sized dots of M105. I never used any pad prepping spray/lubricant when I used M105 and an orange pad, and didn't notice any ill effects because of it.

    Just start with a test spot and nail down your system up front. I know you're used to working by hand, but your first time with the DA will be long and tiresome as well. Just be patient and concentrate on your technique at the beginning, and you'll find yourself gaining speed with each panel.

    Good luck, and post your results!

    Mark

  3. #3
    Super Member Dubbin1's Avatar
    Join Date
    May 2009
    Posts
    3,845
    Post Thanks / Like

    Re: Best Pad Prep For DA?

    Simply mist it with water.

  4. #4
    Regular Member
    Join Date
    Apr 2010
    Location
    Fort Wayne, Indiana
    Posts
    123
    Post Thanks / Like

    Re: Best Pad Prep For DA?

    Thank you for your time guys! amazing replys to be honest with you. I am def. doing a test spot to try my steps out. Ive been researching for months on how to get it to a fine liking of my taste and what I am comfortable with. Thanks again.
    Working on a new sig..... still working....... if only it was as easy as buffing out swirls is...... Brad is my name.

  5. #5
    Super Member DARK HORSE's Avatar
    Join Date
    Sep 2009
    Posts
    2,537
    Post Thanks / Like

    Re: Best Pad Prep For DA?

    Quote Originally Posted by Y2KSVT View Post
    I think a lot of people have had good luck prepping the pad with M105. Just apply M105 to the entire pad and gently push it into the pad with your fingers/thumbs. Once you have it pretty well soaked into the pad, apply just a few dime-sized dots of M105 and start your first section pass. After each section, add a few more dime-sized dots of M105. I never used any pad prepping spray/lubricant when I used M105 and an orange pad, and didn't notice any ill effects because of it.

    Just start with a test spot and nail down your system up front. I know you're used to working by hand, but your first time with the DA will be long and tiresome as well. Just be patient and concentrate on your technique at the beginning, and you'll find yourself gaining speed with each panel.

    Good luck, and post your results!

    Mark
    Yes, this is great advice I always prime the pad with the product I am using. This will also help with dusting...
    Signature Car Care... Authorized CQuartz Finest Installer
    http://www.signaturecarcare.com/
    "May the shine be with you" Uncle Stu

  6. #6
    Super Member DetailedByPrecision's Avatar
    Join Date
    Sep 2009
    Location
    SF Bay area, Cali
    Posts
    807
    Post Thanks / Like

    Re: Best Pad Prep For DA?

    Quote Originally Posted by Dubbin1 View Post
    Simply mist it with water.
    x2

  7. #7
    Mike Phillips
    Guest

    Re: Best Pad Prep For DA?

    Quote Originally Posted by kimandbrad21 View Post

    My question.

    1. What OTC (over the counter only) product can I use to prep the pad if it comes down to using M105?
    Meguiar's recommends M34 Final Inspection and you can find it at some NAPAs, Autozones and most any PBE store.

    PBE = Paint, Body & Equipment

    These are "Auto Parts Stores" that cater you your local body shops. You can find one by asking anyone that works at a body shop where they buy their paint and supplies for painting cars.

    Or a mist of water. Or prime with the product itself.


    Quote Originally Posted by kimandbrad21 View Post

    2. Will adding a prep agent (water, QD, IE) will it effect the cut of the product.
    Everything affects everything"

    Kind of a fuzzy statement but true. In your example, misting with water or M34 won't decrease or increase the aggressiveness of the cut to matter in the big pictures.

    A wetting agent, be it water or M34 will simply increase the working time or "buffing cycle" giving you more time to work the abrasives easier.


    Quote Originally Posted by kimandbrad21 View Post

    3. I looked and looked but does anyone have the link for Mike P.'s cleaning a pad on the fly?

    Thanks

    Brad.
    Here you go...

    Quote Originally Posted by Mike Phillips

    How to clean your foam pad on the fly


    When using a dual action polisher to remove below surface defects with any type of abrasive product you’re going to have two things building up on the face of the foam pad that you need to clean off.
    • Spent residue - From the product you’re using.
    • Paint - Small particles of paint that are coming off the car as you abrade the surface


    If you’re working on a clear coat finish then keep in mind you won’t see the paint residue building up on the pad because the clear coat paint is clear.

    Make sense?


    If you’re working on a clearcoat finish, all you're going to see is the color of the product that you’re using. For example if you’re using a white colored polish you’ll see white residue building-up on the pad.

    Now if you’re working on as single stage paint then you’ll see the color of the paint on the car on the face of your foam pad,. For example if you’re working on a single stage yellow paint system then you’ll see yellow paint on the face of your foam pad.

    The important thing to understand is that as you work on the car with your polisher you’re going to be removing a little paint and there’s going to be used-up product and paint building-up on the face of the foam pad. It's important to clean this gunk off your pad often.

    So the question is, how to you clean this gunk off the pad?

    The answer is there’s a number of ways to clean your foam pad, the three most common are,
    • Pad Washer
    • Nylon Brush or Pad Cleaning Brush
    • Terry Cloth Towel
    Out of the 3 options listed above, cleaning your pad on the fly is probably the most popular because it’s fast, and most people have a terry cloth towel in the linen closet that they can use to clean the pad.

    The best way to clean a pad is with a pad washer but before you can use a pad washer you must first own one. Pad washers are worth their weight in gold if you buff cars out with any kind of regularity. If however you’re just buffing out your own personal cars, then chances are you don’t own a pad washer but chances are very good you do own a terry cloth towel or two that you can use to clean your pads on the fly.

    Brushes work good if you’re using a rotary buffer but the only way you can use one with DA Polisher is to turn the polisher off, hold the polisher and pad in such a way that the pad won’t spin and then rub the brush over the face of the pad to scrape off the residue.

    While this works, it means turning the polisher off, (now you're not buffing out the car, remember the time issue?) and grabbing your brush and then brushing the pad. Nothing wrong with this but when you consider how long it already takes to do the cleaning step, (about 4-6 hours for an average size car and that’s if your good at this and if you work fast and don’t take any breaks. So stopping the polisher and using a brush to clean the pad works but it’s not as fast or effective as using a terry cloth towel.

    The whole idea and success behind the cleaning your pad on the fly technique is in that it allows you to clean your pad quickly, (that’s the on the fly part), and then quickly get back to work.

    Again, buffing out an entire car using a dual action polisher from start to finish is an all day job. There is no time for lollygagging. If you lollygag or take long breaks, you either won’t get the job done in one day or you’ll sacrifice doing a quality job during the cleaning step in order to get to the waxing step so you can put the car back into service.


    So let’s take a look at how to clean your pad on the fly

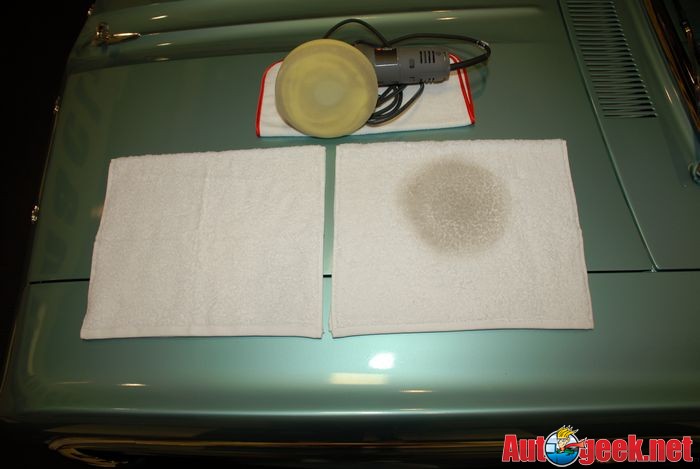
    Cleaning your pad on the fly is where you take a terry cloth towel, usually a medium size hand towel works best, you fold it in two and then simply hold the towel against the face of the pad and then turn the polisher on and use your hand that’s holding the towel to push the towel into the foam. This will act to draw any excess liquid out of the foam and any excess residue off of the face of the pad.


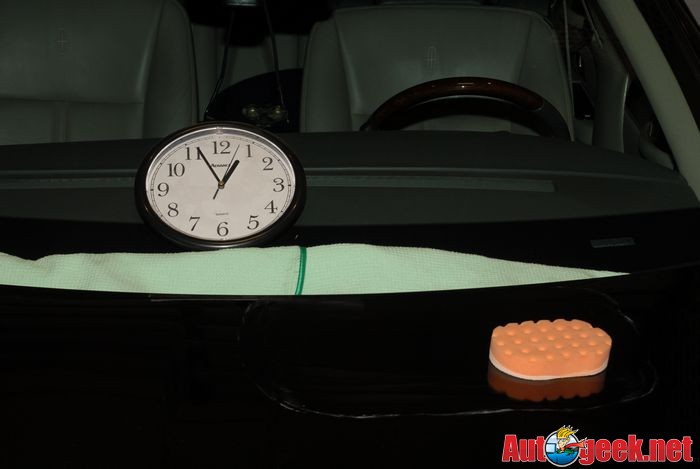
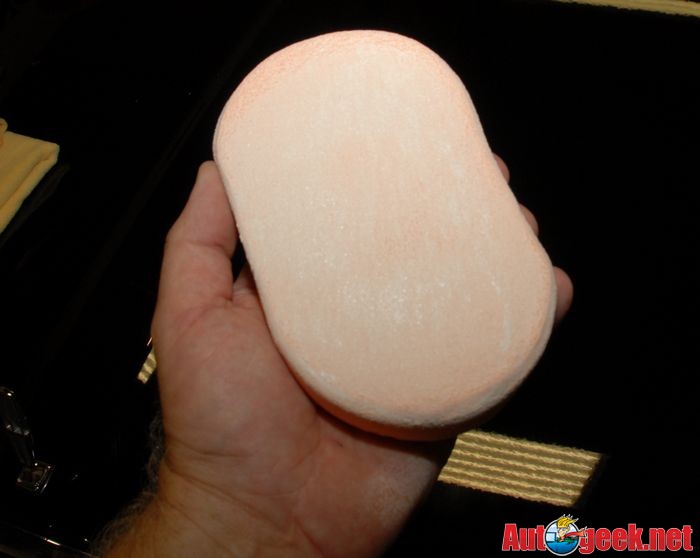
    After polishing a section of the trunk lid on Harvey,


    Max's classic 1964 Ford Falcon Future, we took a brand new 100% Cotton Terry Cloth Towel and held it against the face of the foam pad and then turned the polisher on and pushed and smooshed the towel against the pad for about 45 seconds or so and here are the results.


    Question: Why use terry cloth instead of microfiber?

    Answer: Great question!

    100% cotton terry cloth is very good at absorbing liquid, so when you push the terry cloth into the foam the liquid in the foam will transfer into the terry cloth fibers through capillary action where the cotton fibers will more or less hold or trap the liquid inside of themselves.

    There’s more to it than that however, the nap of terry cloth, that is the little cotton loops, will help to slice into the caked and gummy reside which will loosen its hold so the residue will transfer to the towel as well as some will fall to the ground.

    Compared to most microfiber polishing cloths with a nap, not the type that has flat woven surface, the terry cloth nap, (the nap is the the little tiny loops of cotton fiber), is more stout and it’s this extra stoutness that enables a large, nap terry cloth towel to work better to break-up the residue on the pad.

    So it’s both the absorbency of the cotton fibers plus the larger size of the cotton nap that together make a terry cloth towel better for cleaning your pad on the fly.

    Does that make sense?

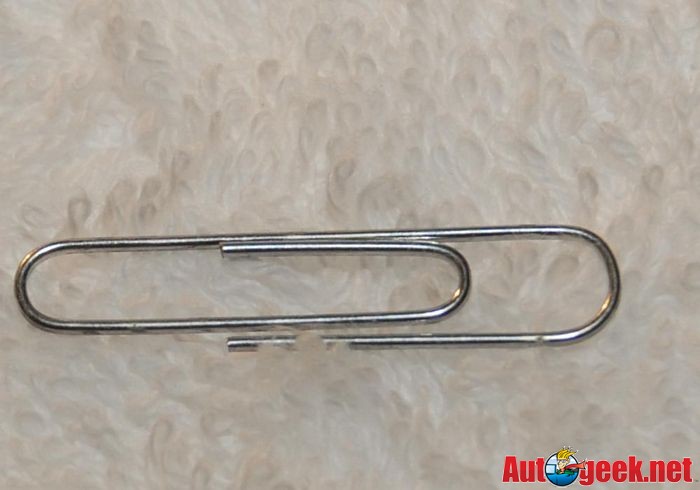
    The nap of 100% Cotton Terry Cloth Toweling


    Conversely, isn’t one of the reasons microfiber polishing cloths are so popular for wiping paint is because the fibers are microscopic in size and thus are more gentle to paint than larger cotton fibers? (The answer is “yes”)

    You can use what you like and make up your own mind. Besides the case I’ve made above for using terry cloth another reason is to save your microfibers for where they excel best and that’s wiping residues off polished paint.

    Some might also make the case that 100% cotton is better at absorbing while microfiber materials are better at adsorbing but that’s probably getting just a little too deep for what is actually a very simple method of cleaning your foam pads while buffing out a car.

    Try both the next time you’re working on a car and come to your own conclusion but for me I’ll use terry cloth towels for removing residues off my pads and I’ll save my microfibers for carefully cleaning residues off paint.


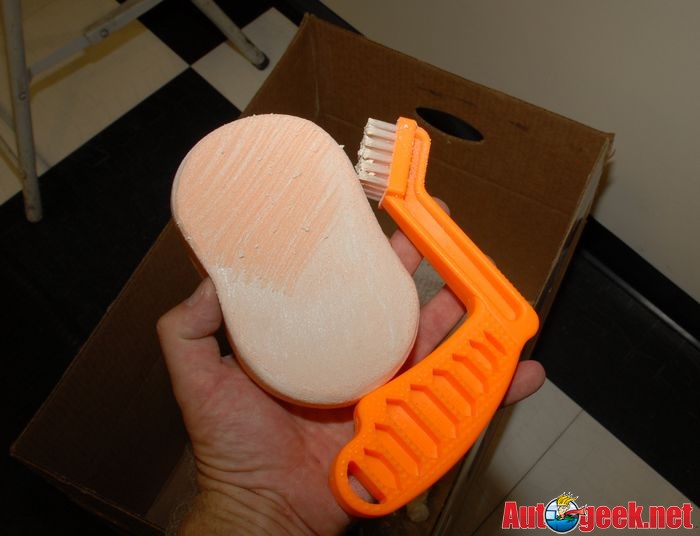
    Question: What about pad cleaning brushes?

    Answer: I touched briefly on this above, but let's drill down a little deeper. Pad cleaning brushes or even a nylon toothbrush work great for cleaning residue off the face of a foam pad when the foam pad is on a rotary buffer but they don't work well at all when the pad is on a dual action polisher.

    About the best you can hope for is to clean the very center of the pad when the tool is turned on but as you draw the bristles of the brush towards the outside of the pad the increased pressure over a small area, (the bristles of the brush pushing down on the foam), is enough pressure to engage the clutch in the tool and stop the pad from rotating.

    The brush only cleans the pad if the pad is rotating. Thus brushes don't work well for cleaning pads on dual action polisher when you're trying to clean the pad while the polisher is turned on. Give it a try sometime and you'll see exactly what I mean.

    For years when someone asks about the cheapie rotary buffers you can buy at Harbor Freight for buffing out paint, I would always mention that if nothing else, they make a great pad cleaner. That is take your dirty pads and one at a time place them on the backing plate of the rotary buffer and then use the rotary buffer to clean your pads. Rotary Buffers are direct drive tools and have a lot of power and a little brush held against the face of the pad isn't enough to slow the tool down so they work great for cleaning pads as well as removing a lot of paint quickly if you're using a RB to buff-out paint.


    The cleaning your pad on the fly technique works well for all the popular dual action polishers on the market including,
    • Porter Cable 7424XP
    • Porter Cable 7424
    • Porter Cable 7336
    • Ultimate Detailing Machine – The first generation was Autopia’s design. The second generation is a re-badged Porter Cable 7424
    • Meguiar’s G100a – Re-badged Porter Cable 7424, came with a lifetime warranty
    • Meguiar's G100 – Re-badged Porter Cable 7424, came with a 1 year warranty.
    • Meguiar’s G110 – Meguiar’s design
    • Meguiar’s G220 – Meguiar’s design – 220 Volts
    • Griot’s Garage Professional Random Orbital Polisher – Griot’s design


  8. #8
    Regular Member
    Join Date
    Apr 2010
    Location
    Fort Wayne, Indiana
    Posts
    123
    Post Thanks / Like

    Re: Best Pad Prep For DA?

    Again thanks for the replys.

    Mike we do have some local stores that sell that, I have seen it when buying #7 which I now know how to really use thanks to your write up. I was just using it as a wipe on, wipe off product and never gave it time to rest.

    I will take multiple steps to find what I like, I think I will start with...
    1. Product Prep and Product
    2. M34 Prep and Product
    3. Water mist and Product

    and see which one goes to my liking and benifits me more.

    Can I ask another question maybe?

    1. I used M105 via CCS Euro Foam Hand Pad: Orange Pad it got gummy and stuck to the paint truly like gum. Why did this happen? How do I correct this?
    Working on a new sig..... still working....... if only it was as easy as buffing out swirls is...... Brad is my name.

  9. #9
    Mike Phillips
    Guest

    Re: Best Pad Prep For DA?

    Quote Originally Posted by kimandbrad21 View Post


    Can I ask another question maybe?

    1. I used M105 via CCS Euro Foam Hand Pad: Orange Pad it got gummy and stuck to the paint truly like gum. Why did this happen? How do I correct this?
    It's nothing to worry about, just a pain. I think I touched on this topic in this thread,


    Man versus Machine

    Here's an excerpt...

    Quote Originally Posted by Mike Phillips

    First we're going to use Meguiar's Ultimate Compound for our first step process with both the orange and the white CCS Euro Foam Hand Polish Applicators. That's right, we're going to rub-out the paint using two different levels of aggressiveness in our foam applicators because we want the driver's side of the hood to look as good as the machine buffed side.

    We'll start with the aggressive orange pad and put quite a bit of passion behind the pad and then follow this with the white foam applicator pad and lessen our pressure. After the compounding step we’ll do the polishing step, so this half of the hood is going to get 6 cleaning steps before applying the wax.


    With a new, dry pad it's important to add an ample amount of product to start with, as your pad becomes wet with product you can cut down a little on the amount of product you apply. Because you're going to be applying firm pressure with a quick hand movement, you need enough product to provide good lubrication.


    Start by spreading the product out over the area you're going to work so you have a uniform layer of product over this section. Sometimes you’ll see a film of product or patches of product on the paint, this is normal and nothing to worry about.


    After spreading the product out, begin to work it over and against the paint. Below is a somewhat thick looking layer of product, that's okay because there are a lot of swirls and scratches in this hood and they're going to need some convincing to leave.


    Work the product over and against the paint with firm pressure. You can work the product in circles or straight-lines. If your products of choice are non-abrasive in that they won't leave deeper scratches behind in the paint than they're removing then you can move your hand in whatever direction you fancy, either overlapping circular motions or back and forth in overlapping straight line motions.

    Here's something seasoned old-timers know about working by hand. It's easier to spread a product out using a circular motion than straight-line motions. FWIW.


    Personally I use both directions. I start out using a circular motion to spread the product out and then switch to straight-line motions to really work the product against the paint hard and fast. As I do this, excess product will accumulate at the end of my throw. As I see the product build-up, I'll take a moment to switch to circular motions to grab this perfectly good product and bring it back into the center of the area being worked so I can continue to work it. This also saves product. I’m not a cheapskate, but I am a spendthrift and I want to get the most bang for my buck.


    Keep your hand moving at a fast pace and as you apply pressure to the pad you'll see the product on the surface go from a whitish, opaque film or layer of product to a clear, oily residue that almost looks and feels like you're applying mineral oil or Vaseline over the paint. This is normal and this is what you should see if you're working the product carefully and correctly.


    I started at approximately 12:47pm and after this first section I've already used about 10 minutes just to rub-out this first section with two applications of Ultimate Compound.


    After a few sections you’ll get a build-up of spent product on the face of your pad. This is normal for ANY compound or paint cleaner. You want to clean this build-up of spent product off the face of the pad before applying fresh product.


    Here's I'm using The Edge Foam Pad Conditioning Brush but you could also use a firm bristle toothbrush.


    Just try to work clean, only work small areas at a time and clean your applicator pad often and wipe all residue off as best as you can.


  10. #10
    Regular Member
    Join Date
    Apr 2010
    Location
    Fort Wayne, Indiana
    Posts
    123
    Post Thanks / Like

    Re: Best Pad Prep For DA?

    I must say sorry I think I worded that wrong. The pad does have some spent product on it because of working the area... but there is a gummy film on the car, it came down to me having to work alot more then I thought I had to for a 2x2 section. I ended up having to use a QD to take it off the paint. Again sorry for not wording that right.
    Working on a new sig..... still working....... if only it was as easy as buffing out swirls is...... Brad is my name.

Page 1 of 2 12 LastLast

Similar Threads

  1. New Car Prep
    By miniSguy in forum Auto Detailing 101
    Replies: 2
    Last Post: 09-28-2014, 05:57 AM
  2. Klean Strip Prep-All prep solvent
    By builthatch in forum Auto Detailing 101
    Replies: 16
    Last Post: 04-10-2013, 10:22 PM
  3. ONR as a pad prep?
    By dennisi01 in forum Auto Detailing 101
    Replies: 2
    Last Post: 09-29-2010, 12:55 PM
  4. New car prep?
    By SPiN in forum Auto Detailing 101
    Replies: 6
    Last Post: 10-14-2007, 10:02 PM

Members who have read this thread: 0

There are no members to list at the moment.

Posting Permissions

  • You may not post new threads
  • You may not post replies
  • You may not post attachments
  • You may not edit your posts
  •  

» April 2024

S M T W T F S
31 1 2 3 4 5 6
7 8 9 10 11 12 13
14 15 16 17 18 19 20
21 22 23 24 25 26 27
28 29 30 1234