 Thanks: 0
 Likes: 0
 Dislikes: 0
-
Orbital polishing creases and edges?
Hi. I will be using a dual-action orbital polisher and foam cutting pad for the first time. I have 2 questions for 2) different areas of my car:
1) My Saturn Sky has a raised crease down the center of the hood, which is a normal contour. When going over it with the polisher, are you supposed to go in 1 motion from the left part of the hood, crossing over the crease, and then over to the right side of the hood; or just stay on the crease the whole time and go in a straight line from top to bottom along only the crease? Also, are you supposed to use less pressure, or go over it quickly, etc.?
2) What about the edges of the car where the hood meets the side of the car? When going over it with the polisher, are you supposed to go in 1 curving motion starting from the hood, to the edge, to the side panel; or just stay on the edge the whole time and go in a straight line along only the edge? Also, are you supposed to use less pressure and/or go over it quickly?
This kind of stuff is confusing not knowing what to do unless you're told or shown.
-
Re: Orbital polishing creases and edges?
 Originally Posted by Johnenewt1

Hi. I will be using a dual-action orbital polisher and foam cutting pad for the first time. I have 2 questions for 2) different areas of my car:
1) My Saturn Sky has a raised crease down the center of the hood, which is a normal contour. When going over it with the polisher, are you supposed to go in 1 motion from the left part of the hood, crossing over the crease, and then over to the right side of the hood;
or just stay on the crease the whole time and go in a straight line from top to bottom along only the crease?
The last option...
See my article here,
The Yoda Technique for Buffing out a Car
Because some panels are not large and flat, especially on modern cars which are aerodynamic and for this reason very curved, then you use what I call the Yoda Technique, that is you,
"Let the panel be your guide"

(When you read the above sentence, use your best Yoda impersonation)
So of course, if you're working a long, thin panel then you might best work that panel by only going in one direction and doing your best to overlap your passes.
Basically whatever it takes to get the job done.
Originally Posted by Johnenewt1
Also, are you supposed to use less pressure, or go over it quickly, etc.?
You don't want to hammer on edges or raised body lines. So use good judgment. As long as no caveman detailer has buffed hard on the raised body lines or edges you're pretty safe when using foam pads and quality products.
Here's another article for you...
Best Practice - Avoid buffing on top of body lines and edges
Buff up to body lines and edges but try not to buff directly on top of body lines and edges
A good best practice whenever you're machine cleaning is to buff up to hard body lines but don't buff on top of hard body lines. There are two reasons for this,
1. Paint tends to flow off high points a little after it's sprayed but before it's set-up, so paint will tend to be thinner on edges and body lines.
2. There will be increased pressure from your pad onto the paint because the body line or raised edge will be higher than the rest of the surrounding paint.
This is what can happen, if you look carefully at the hard body line on the hood of this VW you can see where someone has remove too much paint and exposed the primer under color coat. This is an older VW and has what appears to be a single stage finish but the principal behind avoiding buffing directly on top of an edge or hard body line still applies.
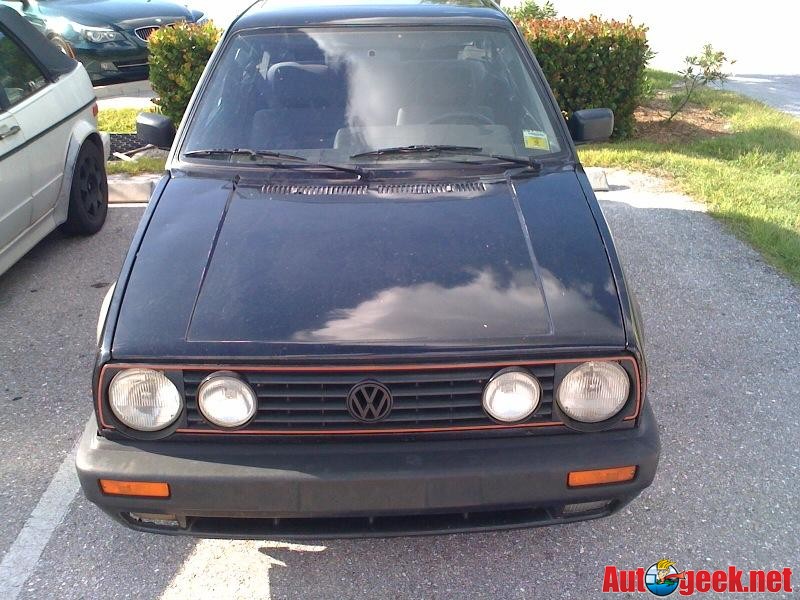
This is a little out of focus, sorry I was using my iphone...

As Benjamin Franklin once said, an ounce of prevention is worth a pound of cure.
A good best practice is to avoid buffing on top of hard body lines and edges and instead just buff up to them. You can also tape them off using thin painter's tape so in case you get your buffing pad close to the raised body line or edges you have a measure of extra protection.
This is where either slowing down and focusing on the task at hand comes into play or using smaller pads when working on thin panels.
Originally Posted by Johnenewt1
2) What about the edges of the car where the hood meets the side of the car? When going over it with the polisher, are you supposed to go in 1 curving motion starting from the hood, to the edge, to the side panel; or just stay on the edge the whole time and go in a straight line along only the edge? Also, are you supposed to use less pressure and/or go over it quickly?
You divide up large panels into smaller sections and then buff one small section at a time.
When you start a new section, overlap a little into the previous section for good UMR or Uniform Material Removal.
Here's another article....
How to divide larger body panels into smaller sections for machine buffing
How I would section any body panel would be easier to figure out if I were standing right in front of the vehicle, that said, here's how I would probably divide the hood of a 2007 Tahoe into smaller sections to polish with a Porter Cable type dual action polisher.
If using a more powerful tool, rotary , Flex 3401 or Rupes, you could take the small section I've outlined and tackle more of them at one time. I'd still divide the center large mass of the hood into at least two section and possibly 4 sections depending how much correction is needed.

These, longer, THINNER sections of a body panel are the norm for a lot of cars, trucks and suvs and this is why I like 5.5" pads on tools like the PC and even 4" Spot Repair Pads and that's because smaller diameter pads fit modern cars better than large pads.

As far as the raised body lines go, for the soft rolling body lines I wouldn't bother taping these of just don't hammer on them.
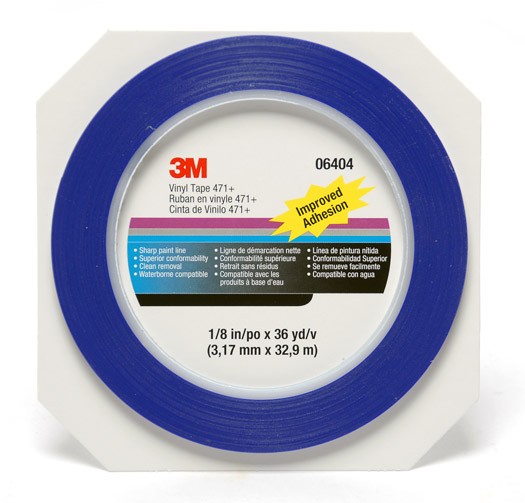
For any sharp raised body lines, bet some painter's tape or if you really want some nice tape, get the 1/4" 3M Blue Vinyl Tape to protect them but I don't think I would using a PC, it's just not aggressive enough for the edges on this body style.
3M Blue Vinyl Tape
Worth it's weight in gold...
3M Vinyl Tape 1/4 Inch - 06405

3M Vinyl Tape 1/8 Inch - 06404
The big picture idea is...
- Break larger panels into smaller sections.
- Try to use natural edges, raised body lines and segmented panels as natural dividing lines for the smaller sections.
Avoid trying tackle too large a section at one time when using tools like the PC/Megs/Griot's polishers or you'll end up with shiny swirls.
That is, you'll feel like you're getting a lot of work done because you're knocking out larger sections but at the end of the day, when you do the final wipe-off of wax the swirls will still be in the paint, (because you didn't remove them), they'll just be shiny.
Originally Posted by Johnenewt1
This kind of stuff is confusing not knowing what to do unless you're told or shown.
A good forum gets you the help you need in a friendly manner....
Hope the above helps...

-
Re: Orbital polishing creases and edges?
"Very much... I thank thee. To find these articles... A long time it would have taken me"... - Yoda.
-
Re: Orbital polishing creases and edges?
Originally Posted by Johnenewt1
"Very much... I thank thee. To find these articles... A long time it would have taken me"... - Yoda.
You're welcome.

Similar Threads
-
By charlestek in forum Auto Detailing 101
Replies: 1
Last Post: 09-15-2019, 06:39 PM
-
By travis2375 in forum Ask your detailing questions!
Replies: 12
Last Post: 03-15-2012, 08:42 AM
-
By spike in forum Auto Detailing 101
Replies: 11
Last Post: 11-22-2011, 08:56 PM
-
By cincibcat9 in forum Auto Detailing 101
Replies: 29
Last Post: 10-14-2010, 05:39 PM
-
By Al D in forum Ask your detailing questions!
Replies: 3
Last Post: 09-27-2010, 08:27 PM
 Members who have read this thread: 0
There are no members to list at the moment.
Posting Permissions
- You may not post new threads
- You may not post replies
- You may not post attachments
- You may not edit your posts
-
Forum Rules
|
| S |
M |
T |
W |
T |
F |
S |
| 31 |
1
|
2
|
3
|
4
|
5
|
6
|
|
7
|
8
|
9
|
10
|
11
|
12
|
13
|
|
14
|
15
|
16
|
17
|
18
|
19
|
20
|
|
21
|
22
|
23
|
24
|
25
|
26
|
27
|
|
28
|
29
|
30
| 1 | 2 | 3 | 4 |
|


 Reply With Quote
Bookmarks