 Thanks: 0
 Likes: 0
 Dislikes: 0
-
Removing Swirls
ok, just got my PC7424 out and first time use. O my 2001 Toyota 4-Runner.
I have 2 items I am trying to accomplish, the first is to remove some bird dung that had set in (I have not been able to completely remove since last year. As soon as I noticed it after a couple of days, I washed it off and clayed area).
I am using Meguaire's 205 and 105. Car was cleaned and had been clayed.
I started with the 205 (least aggressive and orange pad) no luck, I then tried with more aggressive 105/orange pad still and still not removed. It seems I am having the same luck with removing swirls (scratches as well).
I know it has got to be my technique. I am appling product onto pad and working product until it becomes translucent and then wiping off. Also after applying product both pads look dirty (SUV is Black and I have owned it since new and has never been wrecked or repainted).
What am I doing wrong? After applying most aggressive product, I did not go to least aggressive product and less cutting pad, since I did not see the swirls remove. Do I just need to keep going over area with most aggressive product and orange pad and check again after each application? The reason I asked is I dont want to remove paint from SUV.
Any help would be great-
Thanks
Last edited by happyone; 03-18-2012 at 06:22 PM.
-
Super Member

Re: Removing Swirls
Are you doing your section passes in a slow over lapping movement?
Are you keeping about 10-15 pds of pressure on the PC?
Are you cleaning the pad with a terry cloth towel frequently?
Did you prime the pad with 105 and then put 3 dime size drops, work over a 2x2 section on speed 3 to evenly spread the product and then go up to speed 5 or 5.5 for 4-6 section passes?
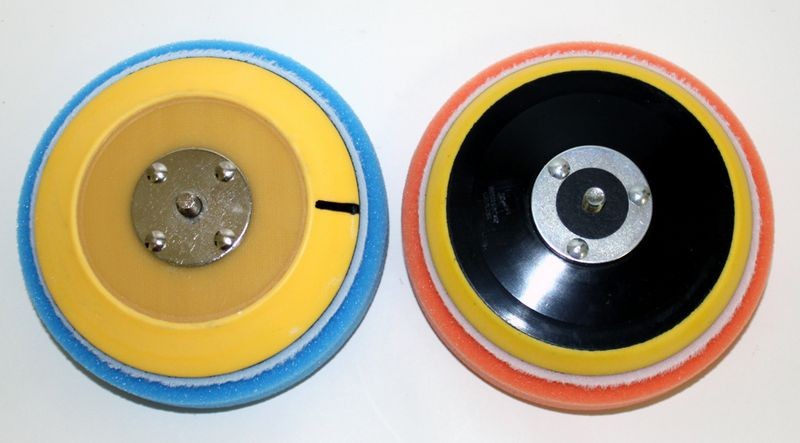
What size is the pad? 5 inch pads are better for cutting than 6 or 6.5.
Maybe you need a more aggressive pad, like yellow foam heavy cut.
BTW ever since I started using MF pads I am phasing out my foam pads and using them for light polish and LSP. Megs MF pads and the D300/D301 are some easy to work with, great cut and finish down nicely. I am beginning to phase out 105 too. the D300 is so much easier to work with.
-
Re: Removing Swirls
thanks for the info. It's all in the technique and you gotta have the right one (working on mine ). I am using the 5" pad from CCS. I didn't order any more aggressive pads as I didnt think I would need them. I will go back and try again following your suggestions, once the weather clears up and let you know how that works. As this is the first go at using a da machine to remove swirls. Is it normal to see black (not sure if it is dirt or paint) on pad. ). I am using the 5" pad from CCS. I didn't order any more aggressive pads as I didnt think I would need them. I will go back and try again following your suggestions, once the weather clears up and let you know how that works. As this is the first go at using a da machine to remove swirls. Is it normal to see black (not sure if it is dirt or paint) on pad.
-
Super Member

Re: Removing Swirls
Have a spray bottle of clean water to lightly spray the polish so it can remain wet, I had a lot of luck with 205 and yellow pad.
Also don't forget to draw a line on your backing plate so you know when your pad is oscillating.
-
Super Member

No pad shouldn't be black. Was car just washed? Are you overlapping on some rubber seals or plastic trim? If paint is contaminated with something you may want to clay first .That will turn your pad black. To remove swirls on what Nissan calls "hard clear coat" I found an orange pad didn't cut it and the yellow made all the difference - that was on my 01 Pathfinder. I too made several attempts without removing swirls or scratches when I first bought my PC. It was my technique. I went and watched all the videos on AG on the PC, swirl removal, etc... If you have a smart phone or IPad you can actually watch the video while your working to get the speed right.
-
Re: Removing Swirls
 Originally Posted by happyone

The reason I asked is I dont want to remove paint from SUV.
You're going to have to remove some paint in order to remove any below surface defects as that's how you remove them, you level the upper surface with the lowest depth of the defects you're trying to remove.
Read through this carefully and see if there's anything that jumps out as you as far as your technique is related...
DA Polisher Trouble Shooting Guide
When you're first starting out machine polishing and learning to use a DA Polisher it's common to have questions about your results and your results are directly tied to your technique.
Here's a list of the most common problems,
1. Trying to work too large of an area at one time.
2. Moving the polisher too fast over the surface.
3. Using too low of speed setting for removing swirls.
4. Using too little downward pressure on the head of the polisher.
5. Using too much downward pressure on the head of the polisher so the pad quits rotating.
6. Not holding the polisher in a way to keep the pad flat while working your compound or polish.
7. Using too much product or using too little product.
8. Not cleaning the pad often enough. Here's a list of the solutions in matching order,
1. Trying to work too large of an area at one time.
Shrink the size of your work area down. You can't tackle to large of an area at one time. The average size work area should be around 20" by 20". Most generic recommendations say to work an area 2' by 2' but for the correction step, that's too large. You have to do some experimenting, (called a Test Spot), to find out how easy or how hard the defects are coming out of your car's paint system and then adjust your work area to the results of your Test Spot. The harder the paint the smaller the area you want to work.
2. Moving the polisher too fast over the surface.
For removing defects out of the paint you want to use what we call a Slow Arm Speed. It's easy and actually natural for most people new to machine polishing to move the polisher quickly over the paint but that's the wrong technique. One reason I think people move the polisher too quickly over the paint is because they hear the sound of the motor spinning fast and this has psychological effect which causes them to match their arm movement to the perceived fast speed of the polisher's motor.
Another reason people move the polisher too quickly over the paint is because they think like this,
"If I move the polisher quickly, I'll get done faster"
But it doesn't work that way. Anytime you're trying to remove swirls, scratches, water spots or oxidation using a DA Polisher you need to move the polisher s-l-o-w-l-y over the paint.
3. Using too low of speed setting for removing swirls.
When first starting out many people are scared of burning or swirling their paint, so they take the safe route of running the polisher at too low of a speed setting but this won't work. The action of the polisher is already g-e-n-t-l-e, you need the speed and specifically the pad oscillating and rotating over the paint as well as the combination of time, (slow arm speed), together with the abrasives, the pad aggressiveness, and the downward pressure to remove small particles of paint which is how your remove below surface defects like swirls or scratches.
Removing below surface defects is a leveling process where you need the abrasives to take little bites out of the paint and to get the abrasives to take these little bites with a tool that uses a Free Floating Spindle Bearing Assembly you need all of the above factors working for you including a high speed setting.
4. Using too little downward pressure on the head of the polisher.
For the same reason as stated in #3, people are scared, or perhaps a better word is apprehensive, to apply too much downward pressure to the polisher and the result of too little pressure is no paint is removed thus no swirls are removed.
5. Using too much downward pressure on the head of the polisher so the pad quits rotating.
If you push too hard you will slow down the rotating movement of the pad and the abrasives won't be effectively worked against the paint. You need to apply firm pressure to engage the abrasives against the paint but no so much that the pad is barely rotating. This is where it's a good idea to use a permanent black marker to make a mark on the back of your backing plate so your eyes can easily see if the pad is rotating or not and this will help you to adjust your downward pressure accordingly.
Correct technique means finding a balance of applying enough downward pressure to remove defects but not too much downward pressure as to stop the rotating movement of the pad.
This balance is affected by a lot of factors like the lubricity of the product you're using, some compounds and polishes provide more lubrication than others and this makes it easier to maintain pad rotation under pressure.
Another factor that can affect pad rotation are raised body lines, edges and curved surfaces as anytime you have uneven pressure on just a portion of the face of the pad it can slow or stop pad rotation. This is where experience comes into play and experience comes from time spent behind the polisher.
6. Not holding the polisher in a way to keep the pad flat while working your compound or polish.
Applying pressure in such a way as to put too much pressure to one edge of the pad will cause it to stop rotating and thus decrease abrading ability.
7. Using too much product or using too little product.
Too much product hyper-lubricates the surface and the result is that abrasives won't effectively bite into the paint but instead will tend to skim over the surface. Overusing product will also accelerate pad saturation as well increase the potential for slinging splatter onto adjacent panels.
Too little product will means too little lubrication and this can interfere with pad rotation.
Again there needs to be a balance between too much product and too little product and finding this balance comes from reading articles like this one, watching videos an most important, going out into the garage and putting in time behind the polisher and as you're buffing with specific product and pad combinations, pay attention to pad rotation.
8. Not cleaning the pad often enough.
Most people simply don't clean their pad often enough to maximize the effectiveness of their DA Polisher. Anytime you're abrading the paint you have two things building up on the face of your buffing pad,
As these to things build up on the face of the pad they become gummy and this has a negative affect on pad rotating plus makes wiping the leftover residue on the paint more difficult. To maintain good pad rotation you want to clean your pad often and always wipe-off any leftover product residue off the paint after working a section. Never add fresh product to your pad and work a section that still has leftover product residue on it.
Pad Cleaning Articles
Why it's important to clean your pads often...
How to clean your foam pad on the fly
How to use the Grit Guard Universal Pad Washer
-
Re: Removing Swirls
Watch this...
Video: How-To do a "Section Pass" when Machine Polishing with a DA Polisher
Then read through this... note the "idea" of doing a Test Spot and when you do the test spot, place a strip of painter's tape onto a horizontal surface and then only buff on one side as this will make it a lot easier to visually detect progress or lack thereof...
DA Polisher Articles - Help for Newbies to Machine Polishing
Below is an excerpt from the above article...
Removing swirls and polishing to a high gloss
Typical speeds for most procedures using most DA Polishers
5-6 Speed setting for removing swirls
4-5 Speed setting for polishing after swirls are removed
3-4 Speed setting for machine applying a wax.
For your test spot I always recommend using a Tape-Line when doing your testing as it will make it very easy for your eyes to detect changes, which usually mean improvements in the test area and gauge how effectively your pads, products, tool and techniques are working on this particular paint system.

MARK YOUR BACKING PLATE
Also, mark the back of your backing plate with a black felt marker like you see below as this will help you to see when the pad is rotating or just vibrating. When you're trying to remove swirls you need the pad rotating.
-
Re: Removing Swirls
Originally Posted by happyone
I have 2 items I am trying to accomplish, the first is to remove some bird dung that had set in (I have not been able to completely remove since last year.
I started with the 205 (least aggressive and orange pad) no luck, I then tried with more aggressive 105/orange pad still and still not removed.
Two Types of Bird Dropping Etchings
Copyright ©PBMA - AutogeekOnline.net® All Rights Reserved
Two Types of Bird Dropping Etchings
- Type I Bird Dropping - Topical Stain Etching
- Type II Bird Dropping - Fractured/Wrinkled Etching
There are two common types of damage associated with bird dropping etchings;
Type I Bird Dropping - Topical Stain Etching
Type I Topical Stain Etchings are usually only topical, that is shallow enough that they can be completely removed or at least greatly improved to the point where they are difficult to see.
This type of etching can be removed using a clear coat safe compound or polish by hand or machine. Hand removal is almost always more efficient as you can exert more pressure to a small area and thus keep your work area isolated to just the affected area. By machine you can use a Spot Repair System, again to keep the work area isolated to just the affected area.
Photo courtesy of MeguiarsOnline.com

Type II Bird Dropping - Fractured/Wrinkled Etching
Type II Wrinkled Etchings are usually too deep to fix safely. The problem is the paint fractures, (splits apart in tiny lines,), or wrinkles as the paint swells and bunches together. In both instances, the resulting defect is throughout the clear layer of paint and not topical. Thus trying to remove it will require removing so much clear paint that you will likely expose the basecoat, or colored layer of paint which has a dull appearance. For this reason it's not safe to try to remove a Type II Bird Dropping Wrinkled or Fractured Etching.
Photo courtesy of AutogeekOnline.com
Note: Every article I've posted to your thread and every link I've posted to your thread are all articles listed in my article list. Dig around in it, chances are good you can find an article for any topic you're interested in...

Similar Threads
-
By 04lss in forum Auto Detailing 101
Replies: 7
Last Post: 04-25-2017, 11:39 AM
-
By david b in forum RV & Motorhome Detailing
Replies: 2
Last Post: 12-14-2016, 09:33 PM
-
By natesmobiledetailing in forum Auto Detailing 101
Replies: 6
Last Post: 08-09-2014, 11:22 AM
-
By keeganjacobs in forum Ask your detailing questions!
Replies: 7
Last Post: 12-13-2012, 09:45 PM
-
By shadowstep in forum Auto Detailing 101
Replies: 21
Last Post: 09-28-2010, 01:30 PM
 Members who have read this thread: 0
There are no members to list at the moment.
Posting Permissions
- You may not post new threads
- You may not post replies
- You may not post attachments
- You may not edit your posts
-
Forum Rules
|
| S |
M |
T |
W |
T |
F |
S |
| 31 |
1
|
2
|
3
|
4
|
5
|
6
|
|
7
|
8
|
9
|
10
|
11
|
12
|
13
|
|
14
|
15
|
16
|
17
|
18
|
19
|
20
|
|
21
|
22
|
23
|
24
|
25
|
26
|
27
|
|
28
|
29
|
30
| 1 | 2 | 3 | 4 |
|


 Reply With Quote
Bookmarks