 Thanks: 0
 Likes: 0
 Dislikes: 0
-
Mike, can we get an addition to the grit guard developed??
i'm talking about a washboard type attachment, stick it on top of the existing grit guard , and allow you to easier rub your mit against it, i always run into the problem that i try to really clean it off on the grit guard, and the guard spins on me, not to mention doing a full arm dunk if you don't throw in two grit guards.
does anyone else have a problem with the way you are forced to deal with the grit guards right now? i think something like this would be pretty beneficial to making it a little easier when doing a 2 bucket wash
-
Super Member

http://www.autogeekonline.net/forum/...ad.php?t=81506
Make your recommendation there!
Sent from my SAMSUNG-SGH-I337 using Tapatalk
-
Re: Mike, can we get an addition to the grit guard developed??
-
Re: Mike, can we get an addition to the grit guard developed??
Yeah somethin like that but specialized to grit guards we all have, and no hole
-
Super Member

Re: Mike, can we get an addition to the grit guard developed??
The newer Home Depot buckets have a tapered bottom that hold my grit guards nice and tight at the bottom of the bucket. I can even dump the bucket without dumping the guard. Take a grit guard to Home Depot and try it out. Shop for a new bucket instead of trying to find a unicorn.
I know a wash board in the guard sounds like a good idea, but it's not. You want the dirt to fall off the wash media and down into the bucket, not redistribute it to another spot on the mitt/sponge/etc. A wash board would keep the dirt very close to the surface of your wash media and not allow it to fall out to a place where it can't get back into the fibers for the next pass on your paint.
-
Super Member

Re: Mike, can we get an addition to the grit guard developed??
I have them, but personally I think the grit guard is a waste of money.
It is hard for me to believe that significant particulate matter released in the water actually makes it down past the grit guard and does not end up suspended in the water. Yes, I can believe that the heavier particles drift downward, but as you pass your mitt/sponge through the water to rub against the guard, particles are released and stay in the water. It would take hours for those particles to settle to the bottom.
In my opinion, the best way to do the two bucket system is to have multiple mitts/sponges or thick nap MFs that are used once and tossed into a "do not use" bucket.

Perfection is attained by slow degrees; it requires the hand of time. (Voltaire)
2013 TESLA MODEL S | Gyeon Syncro | Gyeon Cancoat
-
 Originally Posted by kevincwelch

have multiple mitts/sponges or thick nap MFs that are used once and tossed into a "do not use" bucket.
Skip the grit, and do this. I use 10 mf madness to wash now. Goes a little faster too.
-
Kevin I'm sort of in line with your thinking. I mean I have grit guards in 4 buckets, including my dedicated wheel buckets *BUT*.... I'll never EVER dunk a mitt all the way down to the grit guard. By the time you get it that deep it'll surely stir up any and all but the heaviest sediment, which ends up back in your mitt. Especially if its a Merino wool unit!!! 
Instead I'll rinse well in the top of the rinse bucket and get fresh soap from the top of the soap bucket.
Doing it like that I (quite often) end up with very clean soapy water, enough so that it can be reused. (Or at the very least the paint soap gets poured into thw wheel bucket and a lid put on for next time.) 
Sent from my SAMSUNG-SGH-I337 using Tapatalk
-
Super Member

Re: Mike, can we get an addition to the grit guard developed??
Originally Posted by cardaddy
I'll never EVER dunk a mitt all the way down to the grit guard. By the time you get it that deep it'll surely stir up any and all but the heaviest sediment, which ends up back in your mitt. Especially if its a Merino wool unit!!!
Instead I'll rinse well in the top of the rinse bucket and get fresh soap from the top of the soap bucket.
Doing it like that I (quite often) end up with very clean soapy water, enough so that it can be reused. (Or at the very least the paint soap gets poured into thw wheel bucket and a lid put on for next time.)
Sent from my SAMSUNG-SGH-I337 using Tapatalk
+1
I have been doing this for years and most of the time when I do I chuckle inside at the current design of a grit guard. It certainly looks to clients like there is an intention to keep dirt away; and sometimes one can make an argument that it is cheap insurance. But effective???? I think not.
The sediments that would be able to cause damage to paint will settle to the bottom of the bucket within minutes.
-
Re: Mike, can we get an addition to the grit guard developed??
I've been using the Grit Guard Inserts since at least 2005.
I talked to Doug Lamb just this week about when these tools were introduced for a new project I'm working on and he said 2002.
The Diamond Plate Connector that enables you to connect two bucket dolly's together so you can roll around two buckets at the same time was my idea that I gave to Doug Lamb in 2006 after making my first how-to video,
(Hard to believe that was 14 years ago)
I also ALWAYS use them anytime I'm doing any hand or machine sanding when the papers or discs I'm using can and should be soaked in water.
Basic Hand Sanding Techniques
Soak your papers at least 15 minutes before use.
The Nikken Finishing papers have a latex rubber impregnated paper backing that is waterproof and this prevents the finishing paper from breaking-down into pulp from over soaking. I've personally soaked these paper in water for over 2 years with no visible sign of deterioration. (This was by accident as I lost a sealed Tupperware container filled with water and Nikken papers I used to take with me to demonstrations)
It's possible for grit particles to enter into your water source so if you can, use Grit Guards in the bottom of your bucket.
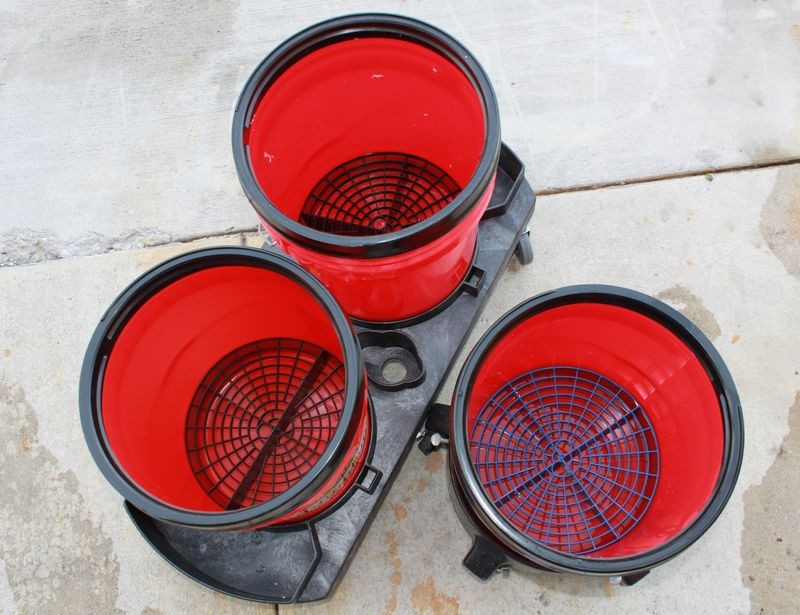
If you want to get really D.O., you can place your papers in dedicated buckets and also use dedicated backing pads for the different grits. The idea is to avoid instilling deeper scratches as you work upward to less aggressive products and to avoid any kind of abrasive particle trapped between your sandpaper and the finish to avoid Tracers.
Dedicated buckets for specific grits of paper. Grit Guard Inserts in the bottom of each bucket.
(You could theoretically use 2, even 3 Grit Guard inserts in each bucket for even more protection)
Try to place your papers in water and soak them at least 15 minutes before sanding. I usually soak my papers overnight and sometimes a few days before sanding.

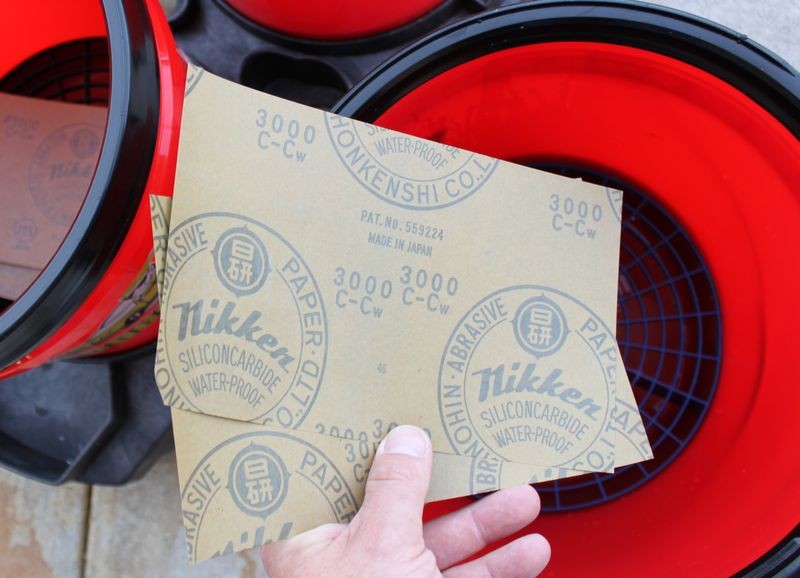
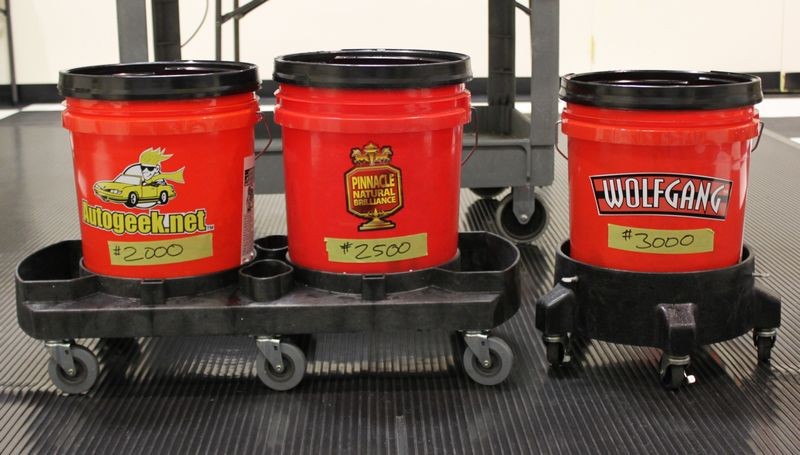
Place different grit papers in their own dedicated water bucket
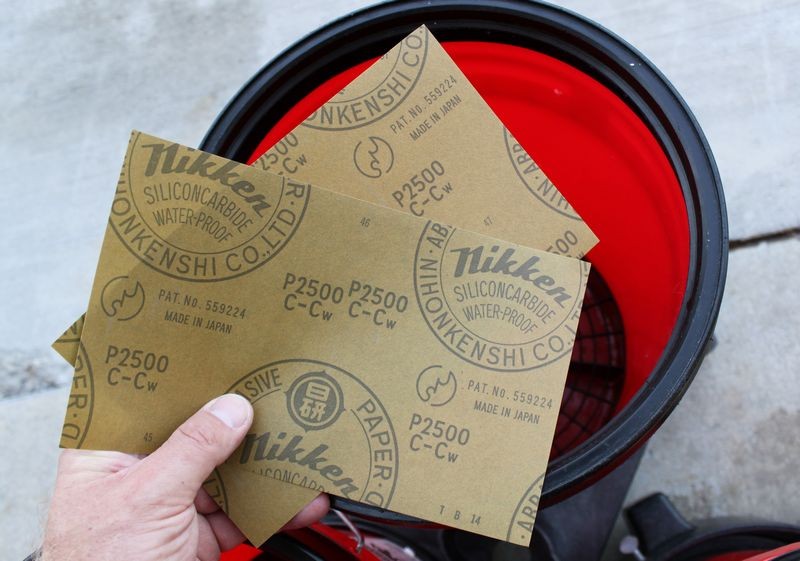
Final sanding should be done with the highest quality grit particle size paper you can obtain. At this time with Nikken that's #3000 grit.
Add just a few drops of a quality car wash soap to help add lubricity to your water. If you're working on Fresh Paint and/or in a Body Shop, (Fresh Paint Environment), then you want to make sure you're using a body shop safe soap.
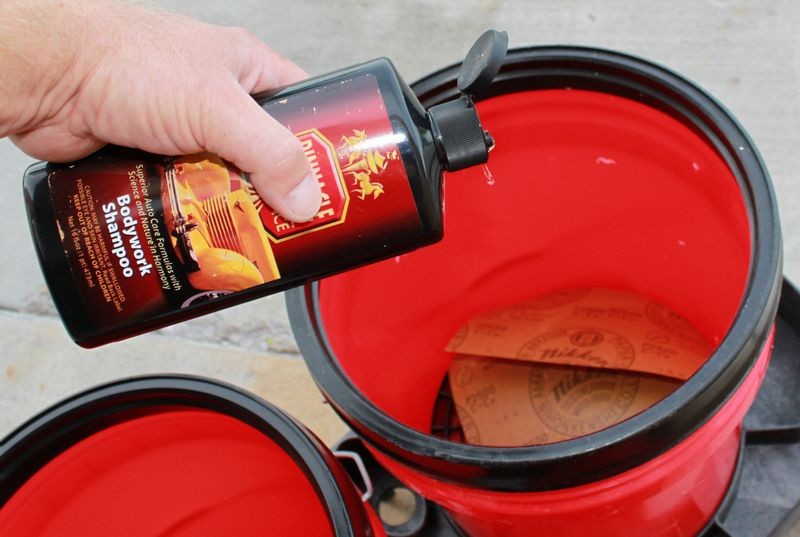
Add fresh, clean water. Also be sure to wash and rinse out your buckets before starting, everything must be surgically clean before placing your papers into the buckets.
It's normal for your papers to roll up like this,


Mark you buckets so you can quickly and easily identify which buckets hold which papers.
The above post was about actual sanding "paper", which is one type of sanding tool that needs to be soaked in water.
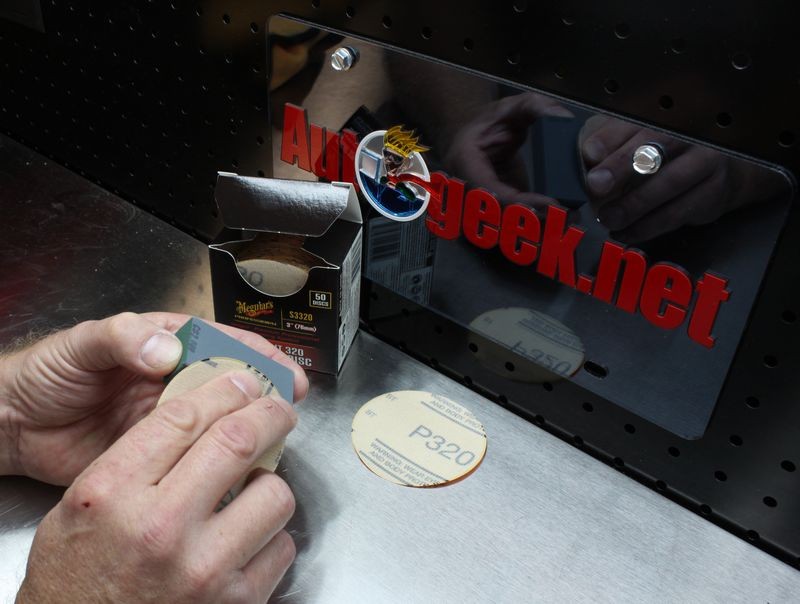
Here's another type of sanding tool, the Mirka Abralon Sanding "discs".
When sanding, one of the biggest problems when machine sanding are what are called Pigtails.
Pigtails are caused when a small abrasive particle, usually coming off your sanding disc, gets trapped between you disc and the paint. The oscillating action of the machine grinds the abrasive particle DEEPER into the paint causing a squiggly scratch that will now require more work to remove.
By adding a Grit Guard or two to your bucket or buckets, you increase the chances that any abrasive particles are trapped on the bottom of the bucket instead of being transferred to the paint you're sanding.
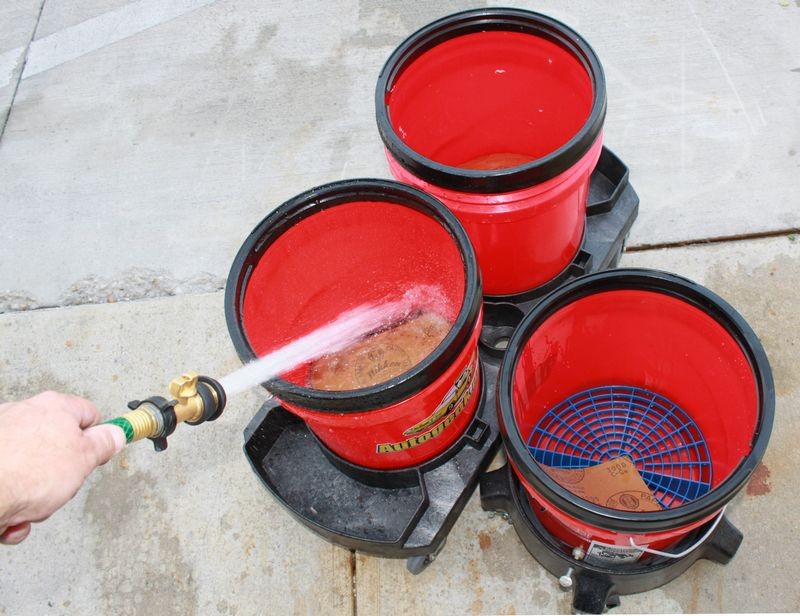
I always use a Grit Guard in my water buckets when wetsanding. Like this,
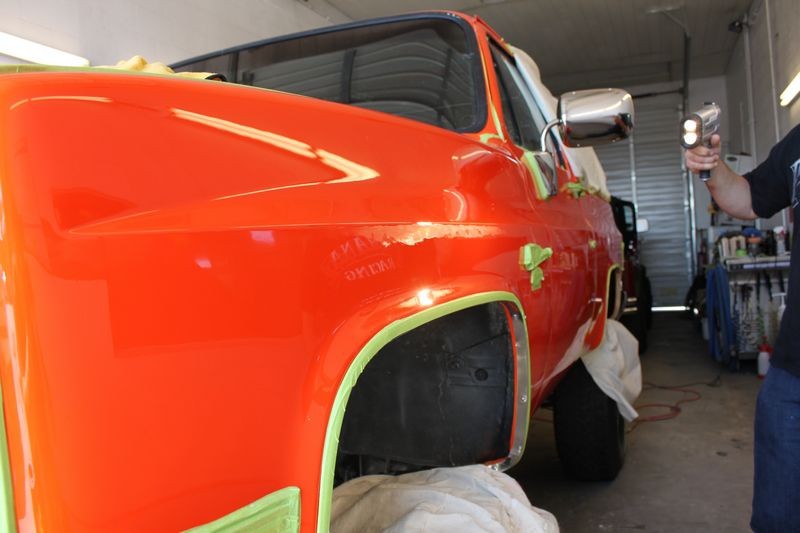
Machine Sanding the Joker Truck painted by Cory St. Clair


Here's yet another advanced technique in the general "craft" of detailing, usually more at body shops but all top detailers usually come across this at some point in their career.
Removing runs, sags and dirt nibs
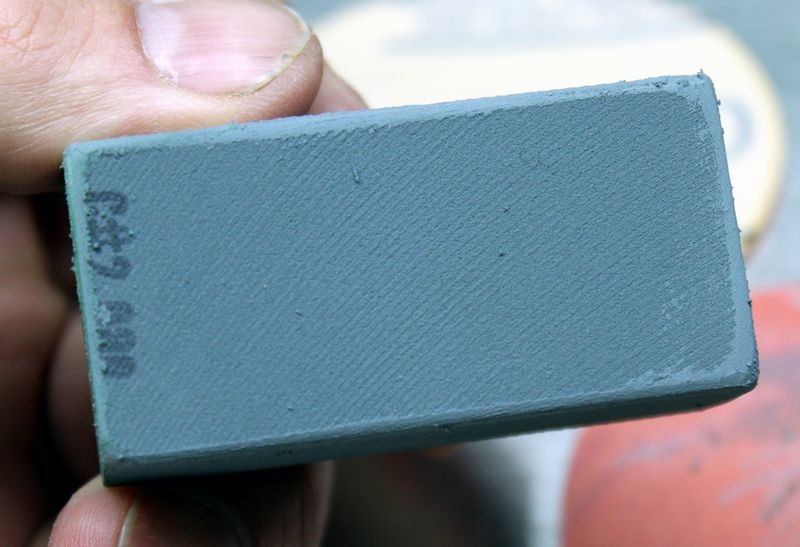
How to use Meguiar's Unigrit Sanding Blocks to remove runs and dirt nibs in paint
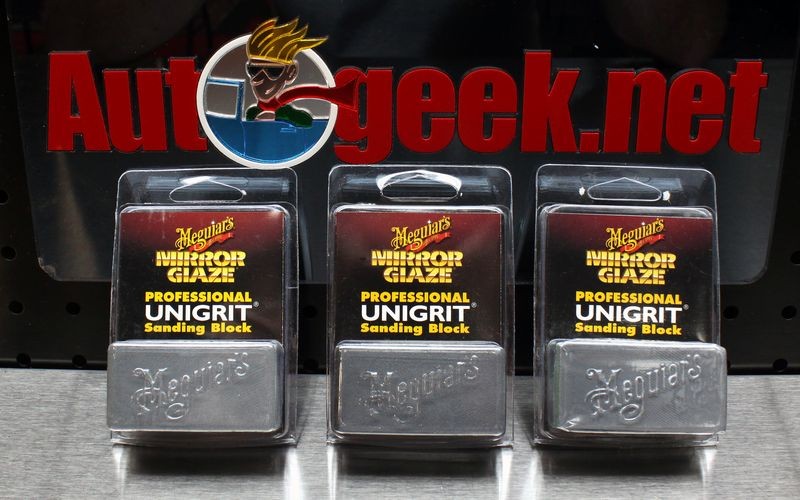
Meguiar's Unigrit Sanding blocks are solid blocks of precise, uniform grit particles that can be used to remove above surface paint defects like runs, sags and dirt nibs protruding out of the paint.
Dirt nibs = dirt particles or other contaminants that land or lodge into fresh paint before it hardens to dust free or tack free.
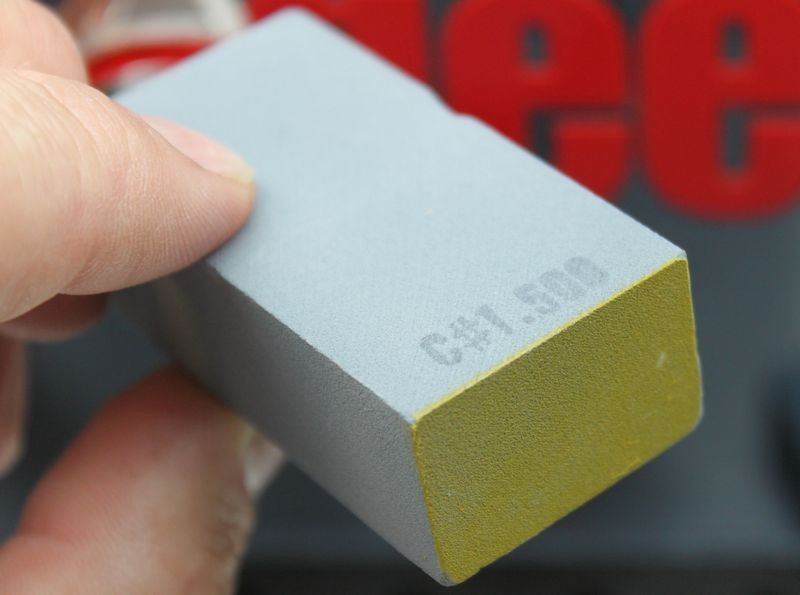
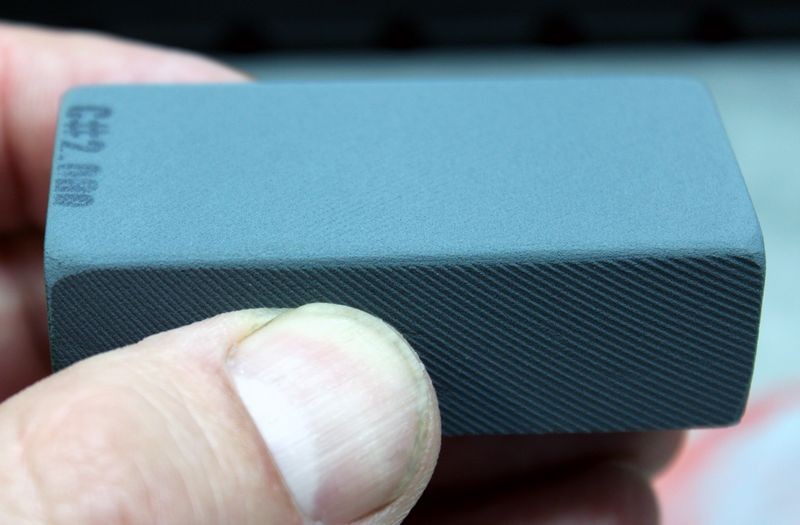
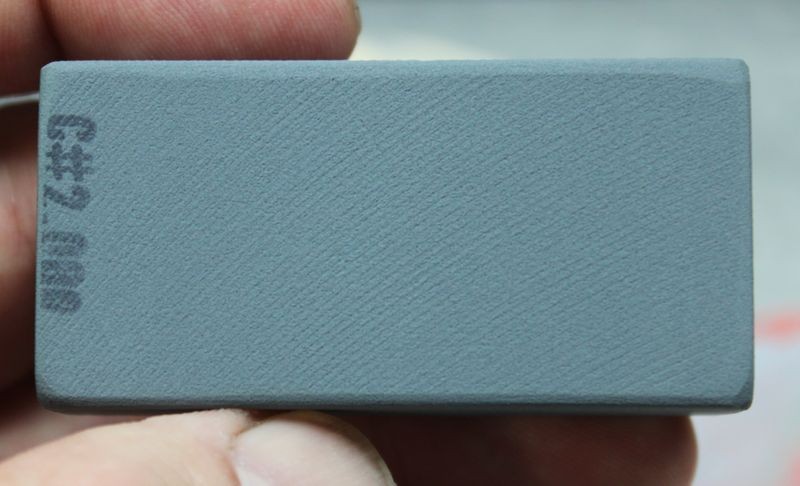
Meguiar's Unigrit Sanding Blocks are available in 3 different levels of aggressiveness.
#1000
#1500
#2000


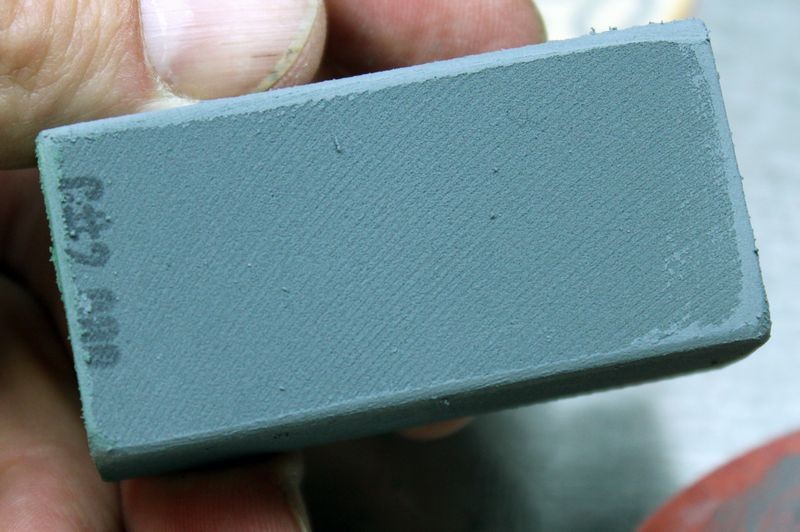
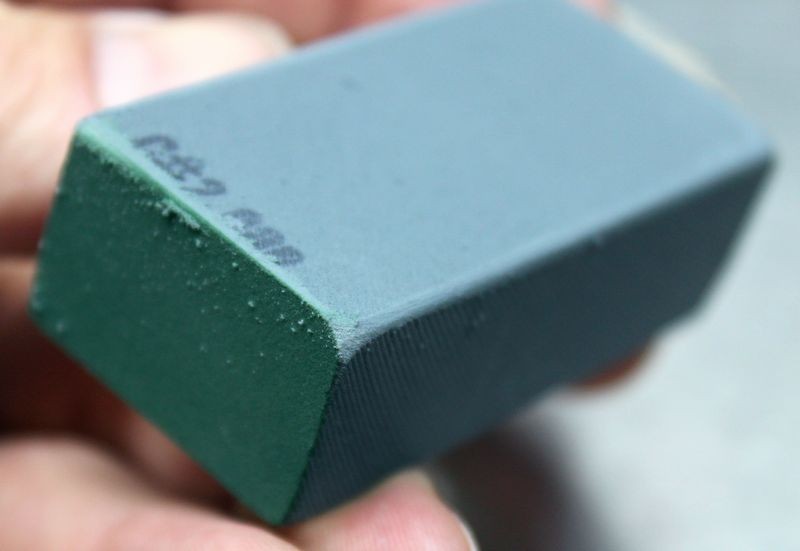
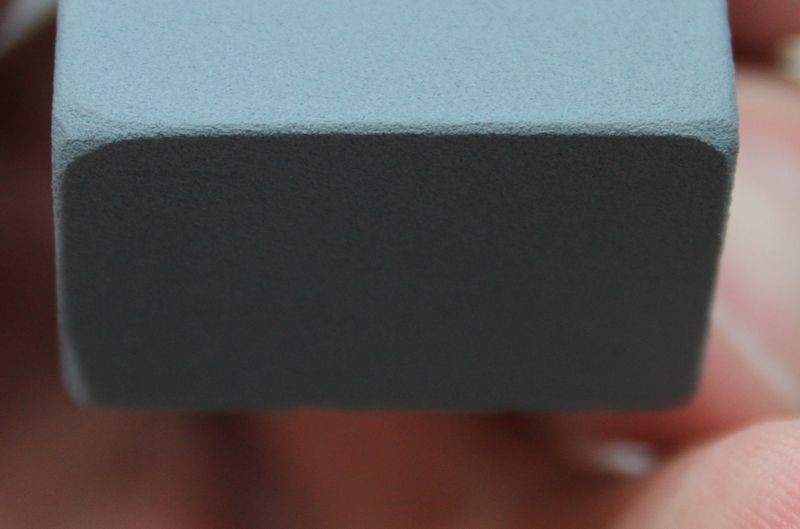
Dressing or shaping Unigrit Sanding Blocks
Before using a Unigrit Sanding Block, knock down the sharp edges by rounding them off this will prevent you from gouging or scratching the paint. Remember, if you're working on fresh paint, (whee these sanding blocks are normally used), the paint will tend to still be soft as it hasn't fully dried and hardened.
To dress your Unigrit Sanding Blocks you can use a more aggressive sheet of sanding paper to round the edges.


Rinse off grit particles
After dressing your Unigrit Sanding Blocks, it's a good idea to rinse them off before placing them in your bucket of water to prevent contaminating your water source.

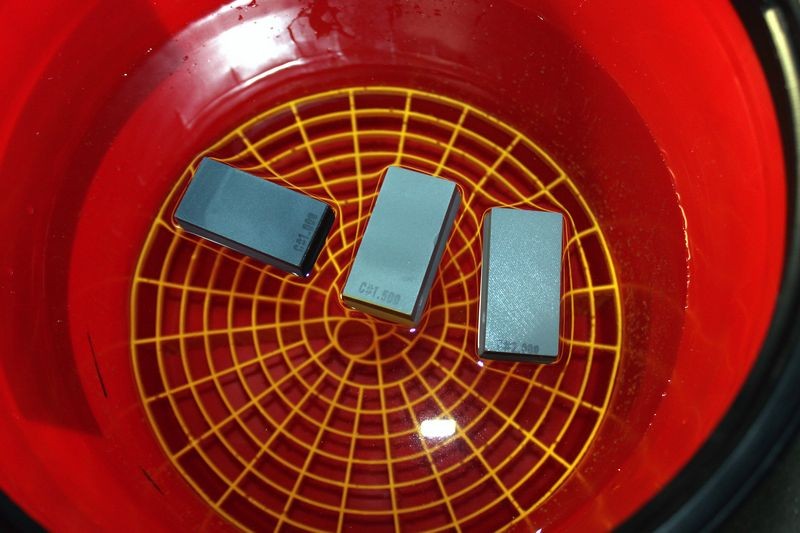
Soak before use
Before using Meguiar's Unigrit Sanding blocks first soak them in clean water until they sink. This is a sign that the blocks have completely saturated throughout with water.
Keep your Unigrit Sanding Blocks in a bucket of water when using them so you can quickly and easily dunk the blocks into the water and rinse any particles off as you're using them. When not in use, Meguiar's Unigrit Sanding Blocks can stored in water to keep them saturated with water and ready to use. Change your water often to help prevent contamination.
Lubrication
You can add a few drops of soap to increase lubricity in the water. If working in a body shop (fresh paint environment), be sure to use a body shop safe soap.

Grit Guard Inserts
To trap any loosened particles of paint or grit particles that wear off the Unigrit Sanding Blocks you can place a Grit Guard Insert in the bottom of your bucket. Some people even use two Grit Guard Inserts to help ensure any abrasive particles on the bottom of the bucket don't migrate.
How to remove a run or paint sag
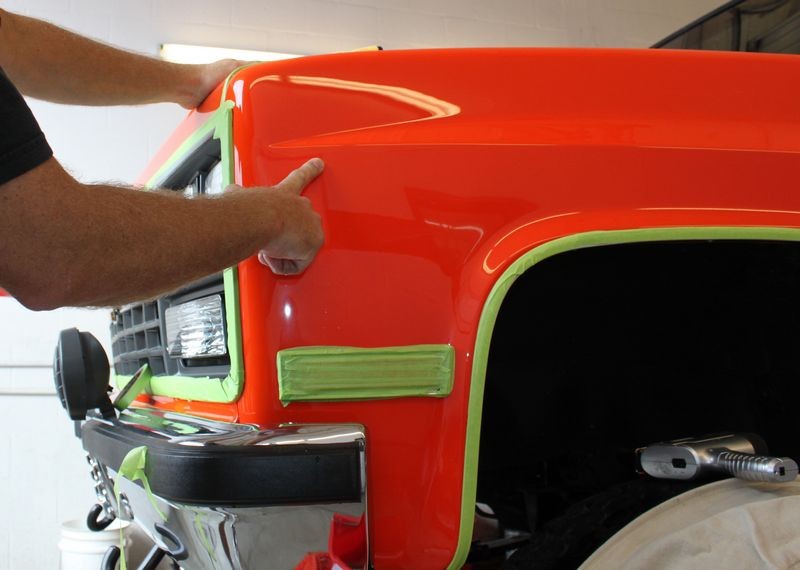
To remove a run, you want to use the side of the block and only sand on top of the run. If the run is thick, you can place tape on the sides of the run to prevent you from sanding on surrounding paint while knocking down the run. At some point you'll have to remove the tape and at this point focus on the task at hand and hold the block in such a way as to only sand on the high points of the run.

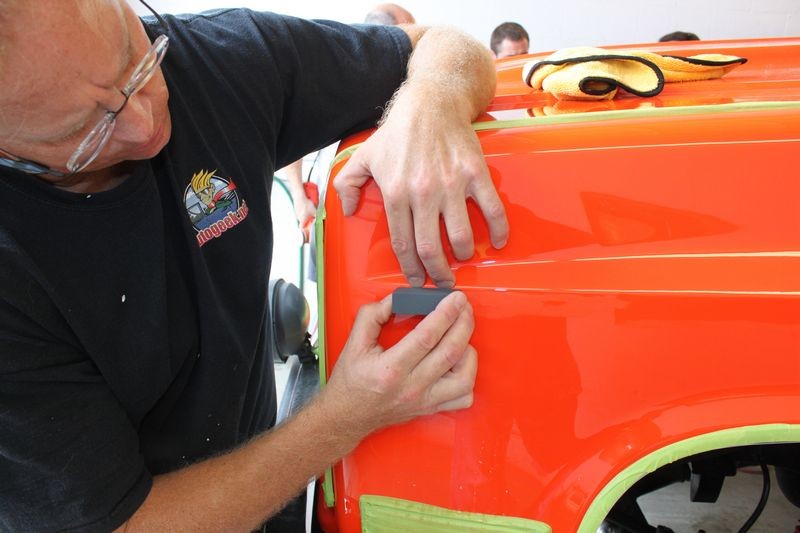
Back and forth direction
Holding the Unigrit Sanding Block firmly, use a fast back and forth motion to sand the run down flat.

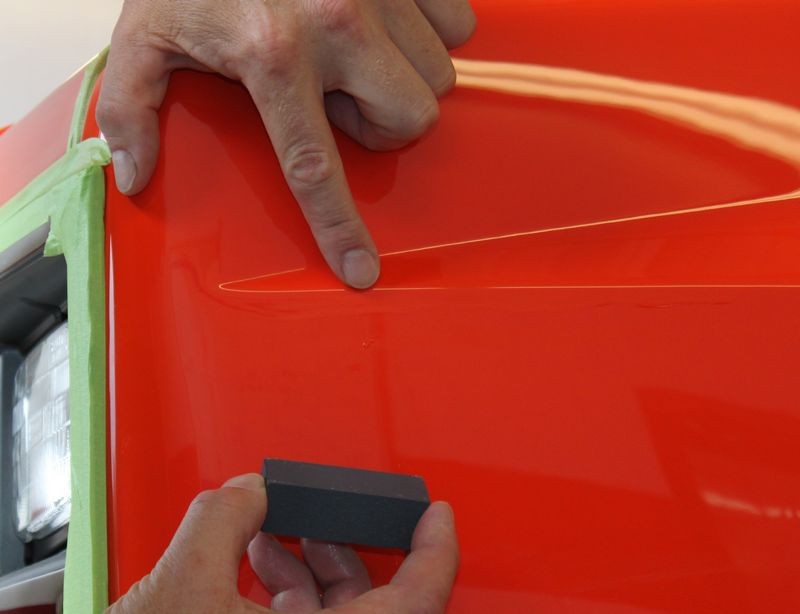
Use fingers as a guide
On the panel below, the run was just below a raised body line. The run was too close to the raised body line to use tape to cover the body line so instead I placed my fingers on the raised body line and used my fingernails as a guide or bumper to prevent my hand motion from running the sanding block over the paint on the raised body line.
Here I've sanded just a little and then stopped to take this picture as the sanding marks have made the run easier to see and capture on film.
The section above was sanded flat and then the sanding marks were buffed out using a compound and a wool pad on a rotary buffer. Next I continued to move down the fender sanding the run flat.
After the majority of the run has been sanded flat I re-sanded the entire area using a Meguiar's 3" #3000 Unigrit foam backed sanding disc on a Griot's Garage 3" Mini Polisher to refine the sanding marks left by the Unigrit Sanding Block to a more shallow depth to make removing faster and easier and without generating as much heat.

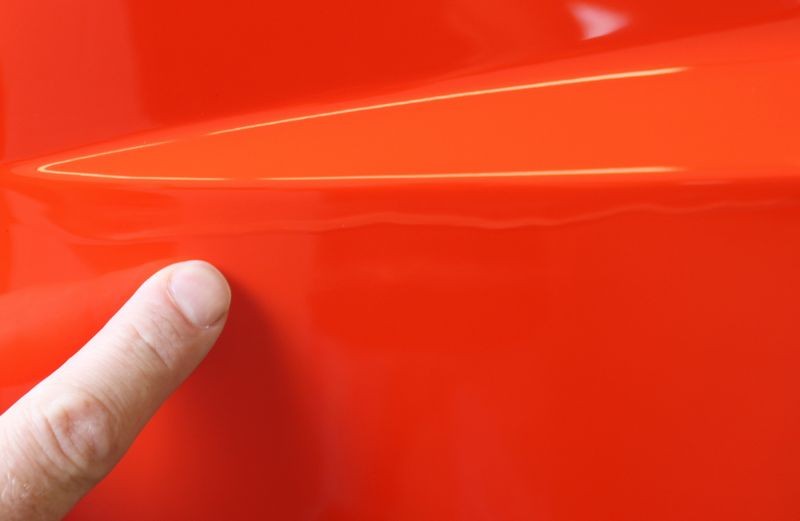
End results...
After the orange peel, runs and dirt nibs were removed, the paint was compounded and machine polished and after 30 days air dry the paint was sealed.

I always use Grit Guards in my bucket when use sanding blocks to remove runs, sags and dirt nibs.
Grit Guard Inserts are a well thought-out tool that has helped hundreds of thousands of car enthusiasts do a better job of safely washing their cars since they were introduced to the car world in 2002.
Of course, each person can find a way that works best for them and if they feel so inclined, share their method a on forum like this one where everyone can discuss the topic till a forum consensus is reached and then move on to the next topic.

Similar Threads
-
By Christopher.Brown in forum Auto Detailing 101
Replies: 54
Last Post: 05-09-2014, 12:19 PM
-
By alko in forum Auto Detailing 101
Replies: 17
Last Post: 07-17-2012, 01:46 AM
-
By Josh@BR in forum Auto Detailing 101
Replies: 16
Last Post: 01-07-2011, 08:47 PM
-
By animescreen in forum Auto Detailing 101
Replies: 8
Last Post: 05-31-2010, 09:22 AM
-
By tommyjitsu in forum Auto Detailing 101
Replies: 2
Last Post: 05-16-2009, 11:45 AM
 Members who have read this thread: 0
There are no members to list at the moment.
Posting Permissions
- You may not post new threads
- You may not post replies
- You may not post attachments
- You may not edit your posts
-
Forum Rules
|
| S |
M |
T |
W |
T |
F |
S |
| 31 |
1
|
2
|
3
|
4
|
5
|
6
|
|
7
|
8
|
9
|
10
|
11
|
12
|
13
|
|
14
|
15
|
16
|
17
|
18
|
19
|
20
|
|
21
|
22
|
23
|
24
|
25
|
26
|
27
|
|
28
|
29
|
30
| 1 | 2 | 3 | 4 |
|


 Reply With Quote
Bookmarks